In the 4th issue of the 2006 edition of the Estonian Nature magazine, Tiia Kurvits writes a lengthy article about collecting minerals. As the topic becomes increasingly relevant, large fairs are held for collectors, and manufacturers offer a wide range of collecting solutions. With the permission of the article’s publisher, we present the article in full here.
Minerals are collected for several reasons. They can provide aesthetic and artistic enjoyment or scientific interest and encourage deeper exploration of the field of rocks and minerals. Minerals can be collected for a home collection, simply out of a passion for collecting, or for a school/local museum. Scientific institutions are primarily guided by scientific goals, but also pedagogical ones, while geological museums aim for broader public education. Minerals and rocks can also accumulate just under the bed or behind a cupboard. To avoid this, advice must be given on how to preserve a valuable collection after the initial excitement. This requires knowledge of the properties of minerals, their identification, and the tools necessary for collecting. It is also necessary to know how to compile and maintain a mineral collection.
What is a mineral? A gemstone dealer in America was asked, “There is a scientific definition of minerals, but what does a mineral mean to you?” He responded, “In my opinion, minerals stand above their scientific definition. They are nature’s sculptures; they are art to me. Distinguishing the chemistry and atoms in a mineral is like saying that Van Gogh’s paintings are merely color, pigment, and canvas. Knowing the technical properties of minerals is a great science, but to appreciate minerals, a scientific approach is not necessary. Minerals represent the beauty of the Earth. I often compare them to flowers, tropical fish, or seashells. They are all works of art created by the Earth.”
Geologists make a strict distinction between minerals and rocks. For a chemical element or compound to be called a mineral, five conditions must be met.
- The mineral must exist in nature, and its formation must be natural. There are also laboratory-grown synthetic minerals, but they are not considered “true” minerals.
- The mineral is mostly inorganic, i.e., not made by living organisms. However, there are exceptions: pearl and amber. To distinguish them from real minerals, they are called mineraloids. Biominerals, such as the shells, cocoons, and teeth of organisms, are not considered “true” minerals either.
- The mineral must be solid. Natural ice also belongs to the minerals, but synthetic ice does not.
- The mineral has a definite chemical composition in which the content of certain elements may vary. For example, the chemical composition of dolomite is CaMg(CO3)2, but the ratio of calcium to magnesium may change.
- The mineral must have a specific crystal structure – the arrangement of ions, atoms, and molecules that gives the mineral its geometric shape. An exception is opal, which does not have a crystal structure; it is amorphous.
How and where to collect minerals?
Minerals can be collected in several ways: by exploring areas where interesting minerals might be found or by exchanging minerals with other collectors. Nowadays, minerals can be bought from stores or ordered online. The latter option is suitable for those who are not satisfied with the stark beauty of Estonia and seek the colorful excitement offered primarily by precious stones from distant lands.
Collecting in nature. You can collect from quarries, rock quarries, cliffs, or exposed river and lake shores. It is advisable to focus on places where limestone and dolomite are exposed, mainly in Northern and Central Estonia and on the islands. There are quarries and outcrops of Ordovician and Silurian rock formations. The sandy cliffs of the river valleys and lakes in Southern Estonia are much poorer; it is not worth looking for visible crystal beauty there. There are many erratic boulders on the coast and inland of Northern Estonia, whose large and well-formed crystals in their composition may also be of interest. With a skillful hammer blow, you can obtain some larger crystals from them.
When collecting minerals from nature, make sure you are not in a protected area. Estonia’s limestone coast is protected in parts: Osmussaar, Pakri, Rannamõisa, Saka, Toila, Ontika, Päite, and Utria banks. A protected area can be recognized by its marking: a white board with a green oak leaf. The signs are placed so that they are visible to everyone from the usual access roads. The Nature Conservation Act provides precise guidelines on how to behave in protected areas and under what conditions work may be carried out there. If interest in a particular object requires a more thorough examination, it is advisable to ask for permission from the owner of the object: an individual or a local government. Researchers who aim to study a protected object are issued a permit by the Minister of the Environment.
Mineral stores and the Internet. In these places, you have the opportunity to supplement your collection with specimens that have not been possible to gather from nature. The merchandise offered in specialty stores and exhibitions (unfortunately, there are none in Estonia) is usually correctly identified and accompanied by information. However, one must be cautious because goods ordered through the Internet may not meet expectations.
What tools are needed on a collecting trip?
The main tools are a geologist’s hammer, a helmet (to prevent rocks from falling on the head while climbing steep slopes), and safety goggles (to protect the eyes from flying chips). It is important to choose suitable, weather-resistant clothing. For determining the location, a map, compass, and GPS are necessary. For initial identification of minerals, a magnifying glass is needed, and additional tools may be taken if necessary (see the section on mineral identification). Depending on the fragility of the mineral, it should be wrapped in soft paper, wrapping paper, or a plastic bag. Information about the mineral must be written on a waterproof plastic bag with a felt-tip pen or added to a paper label.
How to identify minerals?
Using the eye as a compass and other readily available tools, minerals can be identified with a certain degree of reliability quite easily. This relies on the characteristic features (physical properties) of each specific mineral: color (streak color), density, hardness, transparency, luster, cleavage, and crystal shape.
Color. The color of the mineral is the first thing that catches the eye. However, color can be deceptive because the same mineral can occur in many color combinations depending on chemical impurities. The streak color of the mineral is less variable. For example, yellowish pyrite makes a greenish-black streak.
Density. In outdoor conditions, the density of a mineral can be roughly estimated by comparing it with a known density piece held in hand.
Hardness. The relative hardness of minerals can be measured outdoors based on the Mohs scale, where each mineral is characterized by a specific value. For example: gypsum – 2, calcite – 3, quartz – 7. Knowing the hardness of the tools, the mineral being measured can be moved closer to the correct determination by scratching it with them. Hardness of tools: fingernail 2–2.5; pocket knife, needle 5–5.5; window glass 5.5–6.
Luster. Metallic (e.g., pyrite) and non-metallic luster are distinguished, with semimetallic luster falling between them. Non-metallic luster is further divided into several types: for example, adamantine luster (sphalerite), vitreous luster (quartz), pearly luster (sheet gypsum), and silky luster (asbestos). Fracture surfaces mostly lack luster.
Transparency. Minerals can be transparent, translucent, or opaque. For example, pyrite is opaque, quartz is transparent or translucent.
Cleavage. Cleavage is the property of minerals to break into flat-surfaced pieces under the influence of a blow. When cleavage is poor or absent, uneven fracture surfaces are formed. Example: quartz has no cleavage, calcite has perfect cleavage.
Crystal shape. The shape is determined by the internal structure of the mineral as well as the conditions of formation. Therefore, the crystal shape may be variable, but the most common forms of each mineral are generally known. Examples: gypsum – platy crystals, quartz – hexagonal prismatic crystals, pyrite – cubic crystals.
Other properties. In addition to the above, there are other properties that can help identify minerals. Examples: salty taste – halite (NB! Do not taste a mineral that is completely unfamiliar to you, as it may be hazardous to your health!); burns, emits a specific smell on impact – sulfur; magnetic – magnetite; reacts with hydrochloric acid – calcite, etc.
Based solely on color, an inexperienced geologist may not be able to distinguish between calcite, quartz, barite, and dolomite at first glance. From this group, quartz can be easily distinguished because a knife or needle does not scratch it. There is also a specific method for distinguishing calcite – a 3% hydrochloric acid (HCl) solution. When this is dripped onto the crystals, or even better, on finely powdered material, it begins to “boil” or release bubbles. A chemical reaction occurs between calcite and hydrochloric acid, resulting in the release of CO2. If the mineral is still soft enough to be scratched with a needle (try it on crystal faces) but does not “boil” in weak acid, try heating it in a 10% hydrochloric acid solution. If bubbles appear, it is dolomite, which is less reactive than calcite and requires heating to react.
What minerals can be collected in Estonia?
Quartz. Quartz is found almost everywhere under our feet, but large and beautiful crystals worthy of collection are rarely seen in Estonia. The color of quartz is usually white, gray, or colorless. The surface of pure crystals is glassy. Crystals are hexagonal prisms in shape. Crystals do not cleave, meaning that irregularly fractured pieces are formed when struck, with no smooth surfaces. This is a fairly typical characteristic of quartz among other light-colored minerals. But if a beautiful crystal is found, it shouldn’t be crushed. A better way to identify quartz is to try scratching glass with it. If successful, it is likely quartz. Quartz is one of the hardest crystals that can be found in Estonia. Quartz is usually found in pockets in limestone or in cavities in fossils. Quartz druses can be found in the cavities of chalcedony-calcite nodules on the Põõsaspea peninsula, as well as in quarries in Porkuni, Adavere, and Raikküla, or from the Kalana, Rõstla, Niibi, and Aluvere limestone quarries. Crystals of transparent quartz (rock crystals) larger than 1 cm have not been found in Estonia.
Calcite. In the search for beautiful minerals, you are likely to find calcite crystals. At first glance, calcite looks like quartz and dolomite: white, gray, or transparent. Calcite crystals do not have a single, clearly distinctive form – it is one of the most diverse minerals in terms of shape. However, the most common forms are scalenohedrons, rhombohedrons, and prisms with hexagonal cross-sections. Calcite crystals are often grown together. Certainly, identifying the shape of crystals requires a good understanding of geometry and distinguishing details from crystallography knowledge. Calcite crystals are found as pockets in limestone and dolomite or have grown in cracks penetrating the rock (Ohesaare cliff, Panga cliff, quarries around Tallinn). Especially beautiful crystals have been found in the Jaagarahu limestone quarry in Saaremaa.
Dolomite. Dolomite crystals can be found in the rock of the same name – dolomite or dolostone, or also in limestone that has undergone dolomitization. The most famous dolomite quarries are in Kaarma and Tagavere in Saaremaa, but beautiful large dolomite crystals or crystal nests can also be found in Rõstla, Kalana, and Lasnamäe, or in the Northeast Estonian quarries associated with oil shale mining. Dolomite crystals can often go unnoticed because they are mostly found as small rhombohedral crystals in the voids of the rock; rarely do the dimensions of the crystals exceed 2-3 mm. The color of the crystals is white, colorless, or slightly pinkish, yellowish, or brownish. They are rhombohedral in shape and have a vitreous luster. Twin crystals or crystals with curved faces are often found. Dolomite crystals can also be found in limestone veins, for example, in Lasnamäe.
Pyrite. Pyrite is the most common mineral next to calcite, which can be found in Estonian outcrops as collectible crystals and crystal nests. In its unoxidized form, pyrite is golden with a metallic luster, but it is often covered with a violet-brown patina. The crystals are cubic in shape. The largest clusters of cubes (up to 10 cm in diameter) can be found on the Saastna beach and also on the Uisu cliff. In the western part of the North Estonian bank (west of Valgejõgi), there is an extensive layer of pyrite between the violet-brown laminated argillite and the underlying sandstone. In this layer, pyrite is fine-crystalline, so its golden color often remains hidden and appears rather grayish (Maardu quarry). Pyrite nests are also found in argillite. Pyrite is a common associated mineral in limestone fissures.
Baryte or heavy spar. Baryte can be distinguished from other similarly sized rock pieces by its weight, or at least it can be suspected that it may be baryte. Baryte can be found in limestone quarries intersected by vertical fissures. Sometimes baryte crystals have formed on the surfaces of these fissures. Baryte is more commonly found as white, pinkish, and transparent crystals. Light blue, yellowish, brown, and reddish crystals are also possible, depending on the impurities. Its hardness is 2.5-3.5, and it can be easily scratched with a knife or needle. Prospective locations for finding baryte include the limestone quarries of Lasnamäe, Väo, Harku, and Kalana. Crystals have also been found in Vormsi, at the Jaagarahu limestone quarry, and near Kuresaare.
Gypsum. Large gypsum deposits are now beyond the Estonian border in Irboska. In Estonia, gypsum is mainly found as small crystals, mostly not exceeding a centimeter. Gypsum has a hardness of 2, meaning it leaves a mark when scratched with a fingernail. Of course, such a test cannot be performed with small crystals; they simply crumble under the nail, and the result is not accurate. Gypsum crystals that can be found beneath cliff banks are on dark violet-brown argillite layers. Gypsum often forms rosettes: the crystals have grown outwards from a single center. The largest gypsum crystals so far have been found at the foot of Hiiemägi hill – they are 6.5 cm long. An interesting feature of gypsum crystals is the formation of swallowtail twins: two crystals are grown together in such a way that one end of the crystals forms a swallowtail-like branch. The crystals have a pearly luster.
Minerals of erratic boulders. Black mica (biotite), white mica (muscovite), pink potassium feldspar, dark brownish-red garnet, black tourmaline – beautiful large crystals of these listed minerals can be found, with good luck, in pegmatite erratic boulders.
Microcosm. The microcosm of Estonian minerals, which we can explore using a microscope or magnifying glass, adds spice to what is visible to the naked eye. The cracks and veins that densely permeate the rocks in certain areas are potential places where interesting mineral shapes can be observed on a microscale. Cracks and veins are also the most diverse places in terms of mineral composition. Besides calcite, dolomite, pyrite, galena, sphalerite, baryte, and goethite can be found there, but much less frequently than calcite itself. One well-studied place where various mineral forms can be found is the Rõstla quarry, as well as several quarries around Tallinn and elsewhere (for example, Kalana). To discover beautiful forms, it is not always necessary to use an electron microscope; a small hand lens is sufficient. Typically, a lens can achieve magnifications of up to ten times, but there are also lenses with twentyfold magnification. Studying the minerals and their formation in the microcosm gives us the opportunity to learn about the growth and development of seemingly lifeless minerals.
How to store collected pieces?
Most nature enthusiasts often bring back a few stones from their hikes. Sometimes they accumulate into a pile under the table or bed. To illustrate fresh travel impressions, some are shown to friends, but soon the specific place where the stone came from is forgotten, and thus the connection to the experienced memories is lost.
Labeling everything. Upon returning from a collecting trip, the collected items should be labeled first (if you haven’t done so already and you have collected only a few pieces). (NB! When collecting a large number of specimens, do not rely on your memory and write down the initial notes immediately!) There are many ways to label, but the best is to write the information on a small piece of paper, which geologists call a label. The label should contain the name of the mineral (if known), the exact location (country, region, village), the date of collection, and the collector’s name. If the mineral has been identified, the chemical formula and classification (to which class of minerals it belongs) can be added to the label. If you have a specific scientific interest, it is worth following the same rules as for collecting fossils (see the guide in the previous issue of Eesti Loodus). Information-equipped minerals/rocks can be used to obtain interesting information from experts or exchanged for another exciting specimen.
A novice collector may struggle with identifying a mineral. If you cannot get advice from a school geography teacher or a local nature education center, you can turn to literature/online literature or visit a museum. At the University of Tartu Geological Museum, all typical Estonian minerals and rocks are exhibited. By comparing your specimen with them and getting some help from a guide, the identification can be quite accurate. The museum has a website where you can get an idea of what you have collected based on pictures and descriptions. In Tallinn, you can visit the Natural History Museum. It’s worth asking for advice from a museum employee with a geological background. Websites [6, 7] offer you the opportunity to use mineral identifiers based on physical properties and to contact mineral collectors around the world.
Organizing a mineral collection. Minerals can be arranged in several ways: by color, in order of collection time, by location, or based on the classification of minerals (you can find this in the book “Minerals and Rocks”).
Storage. The simplest way is to use small boxes, where you can place individual specimens. Then the boxes should be gathered into a larger, flat box, which allows them to be easily moved from one place to another. The boxes can be made of plastic or cardboard. Plastic can be cleaned of dust more easily, and plastic boxes therefore look good for longer. Nowadays, it is possible to order special storage boxes for geological collections online. It is appropriate to choose a box with a transparent lid. Such boxes are also suitable for educational purposes, and the minerals can be seen by enthusiasts without taking them out of the box.
For those who really don’t plan to collect stones anymore and who want to throw away their or their child’s collection, I would recommend waiting until spring cleaning. Then they could be used as a garden design element in a rock garden or in another suitable place – even as pavement or stone flooring.
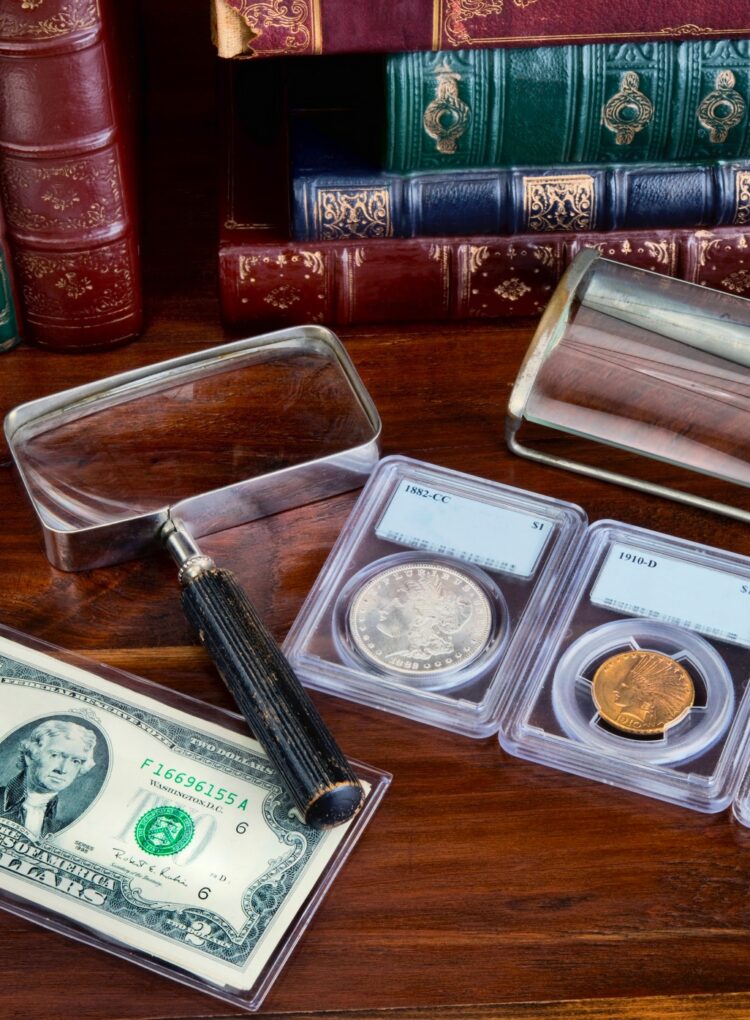
The SAFE e-shop offers a wide range of collection solutions for mineral collectors: display cases, boxes, trays, and various presentation bases. Check out the selection here. If you’re unsure, feel free to contact us!
Featured photo by Frank Cone

